Boards
- Overview
- Examples
- Opening a board
- Creating boards
- Creating folders
- Renaming a board or folder
- Duplicating a board
- Deleting a board or folder
- Board properties
Overview
In Arcweave, a project consists of one or more diagrams, called boards.
A board can contain the following items, some of which you can use to structure your project's flow:
Or to leave notes and collaborate with your team:
When designing your project, use as many boards as you like, to keep your work clear and easily accessible.
{success} Use a different board for each of your project's chapters, scenes, mechanics, etc., grouping them in folders.
{primary} When breaking down a story in multiple boards, you can use jumpers to connect them together.
Once inside a project, view and manage your project's boards and their folders on the lower part of Arcweave's left sidebar. Once there, you can easily spot each of them by its icon:
| Folder | |
| Board | |
| Element |
Examples
There are no restrictions as to what you can use a board for. It can contain a story chapter, a dialogue scene, a game level, or an algorithm.
Some examples are:
- Story parts: whether you call them chapters, scenes, or levels, use a different board for each one of them.
- Synopses: outline your whole narrative in one board, before zooming into its scenes—each of which in a separate board.
- Subplots: main or secondary, lay down all your story plots on different boards to keep them distinct.
- Dialogue: use a different board for each NPC dialogue tree and group all of them in a folder named "Dialogue Trees."
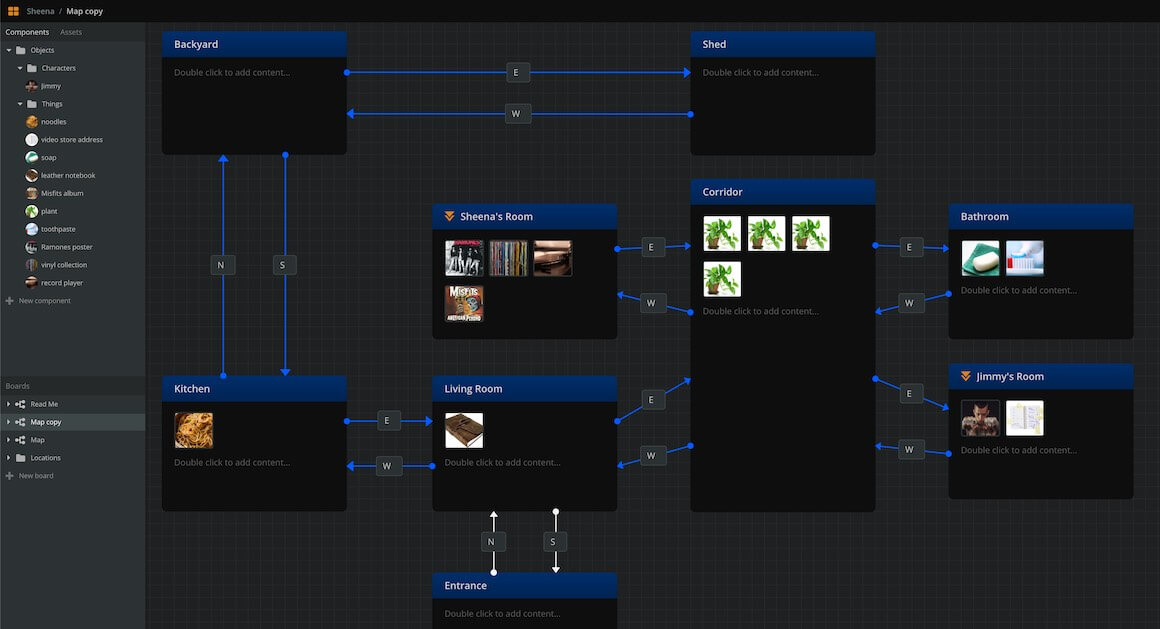
- Locations: create a geography-based diagram for an overview of your game's terrain—or parts of it.
- Puzzle dependencies: create puzzle dependency diagrams, making sure you don't lock that drawer while the key is inside!

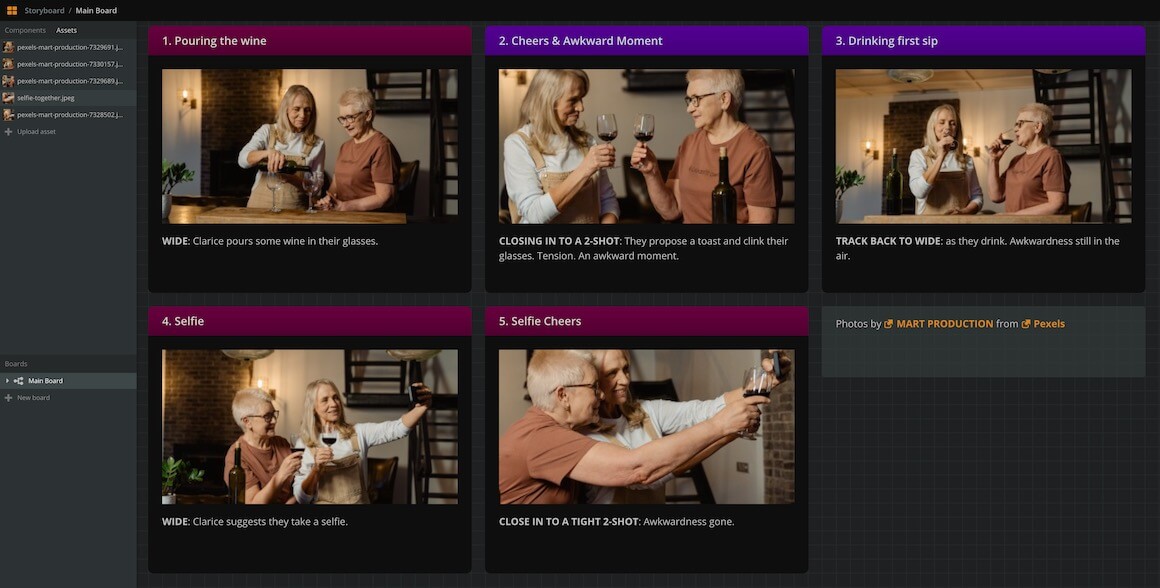
- Storyboards: use Assets as Element covers and tell your story visually.
Opening a board
To open a board, go to your boards on the sidebar and click on its name.
Creating boards
To create a new board at the bottom of the boards list:
- Go to the bottom of the boards list.
- Click on + New board.
Or:
- Right-click on an empty area of the boards list.
- Select Create Board from the menu.
To create a new board over an existing board:
- Right-click on the existing board's name.
- Select Create Board from the menu.
Or:
- Hover the mouse cursor over the existing board's name.
- Click on the '+' icon that appears.
- Select Create Board.
To create a new board inside an existing folder:
- Right-click on the folder's name.
- Select Create Board from the menu.
Or:
- Hover the mouse cursor over the folder's name.
- Click on the '+' icon that appears.
- Select Create Board.
Creating folders
To create a new folder at the bottom of the boards list:
- Right-click on an empty area of the boards list.
- Select Create Folder from the menu.
To create a new folder over an existing board:
- Right-click on the board's name.
- Select Create Folder from the menu.
or:
- Hover the mouse cursor over the board's name.
- Click on the '+' icon that appears.
- Select Create Folder.
To create a subfolder inside an existing folder:
- Right-click on the folder's name.
- Select Create Folder from the menu.
or:
- Hover the mouse cursor over the folder's name.
- Click on the '+' icon that appears.
- Select Create Folder from the menu.
Renaming a board or folder
To rename a board or folder:
- Right-click on its name, on the boards list.
- Select Rename from the menu.
Duplicating a board
To duplicate a board:
- Right-click on its name, on the boards list.
- Select Duplicate.
Deleting a board or folder
To delete a board or folder:
- Right-click on its name, on the boards list.
- Select Delete.
Board properties
To access the properties of any board:
- Right-click on the board's name, on the boards list.
- Select Properties... from the menu.
To access the properties of the current board:
- Right-click on an empty area of the workspace, in the current board.
- Select Properties...
The properties that you can access are:
- Board ID: you can optionally add a custom board ID. It will be used when exporting in JSON format.
- Content: separate numbers of total elements, notes, and jumpers in the board.
- Word count: the number of words used in the board's elements. It includes neither code nor text written inside notes.
- Components referenced in this board: the components that are attached to this board's elements.